Thursday, November 20, 2008
Android workshop at Mobile Dev Camp
Sunday, November 09, 2008
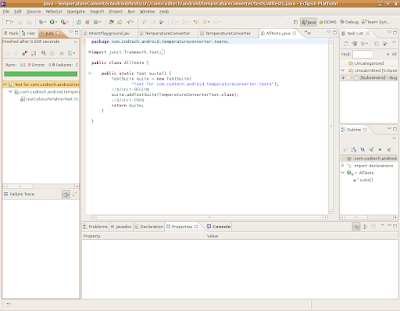
Android: Testing on the Android platform - ApiDemos tests
| This document can be read in Google Docs (http://docs.google.com/Doc?id=ddwc44gs_49stmqs7hb), cut and paste link. |
A previous post,Android: Testing on the Android platform - Unit tests, showed how to add your tests and run them from inside Eclipse. Although these are very useful tests in our quest to Test Driven Development, they cover only a small part of our needs.
Android 1.0 introduced a whole new world of tests cases like ActivityUnitTestCase to run isolated unit tests, ServiceTestCase to tests services and even functional test of activities like ActivityInstrumentatonTestCase.
ApiDemos provides a set of tests but you will not be able to easily run them unless in a non convoluted way as the way they are structured it's not supported by current Android Development Tools (ADT) Eclipse plugin and you would need other tools, but the solution is so simple that I wonder why they are not originally provided in the way we will be changing them.
Google documentation is not helping either.
ApiDemos tests
Tests are located in the tests/src folder and they have their corresponding AndroidManifest.xml.
Inside this folder, tests like this one are found
/*
* Copyright (C) 2008 Google Inc.
*/
package com.example.android.apis;
import android.test.ActivityInstrumentationTestCase;
/**
* Make sure that the main launcher activity opens up properly, which will be
* verified by {@link ActivityInstrumentationTestCase#testActivityTestCaseSetUpProperly}.
*/
public class ApiDemosTest extends ActivityInstrumentationTestCase<ApiDemos> {
public ApiDemosTest() {
super("com.example.android.apis", ApiDemos.class);
}
}
but we will not be able to run them not resorting to ant or maven, unless we make the following set of changes.
ApiDemosTest Android project
Create new project
Let's create a new Android project from within Eclipse, as usual New -> Project -> Android -> Android Project
Activity and Application name are set to Dummy because they are not used as we are seeing shortly.
Copy ApiDemos tests
Copy the tests/src folder from te original ApiDemos project and turn it into a source folder.
Fix the project setup to use original ApiDemos project to resolve references.
Copy AndroidManifest.xml
Again, from the original ApiDemos project copy AndroidManifest.xml overwriting the existing one
Build and run
If necessary, remove ApiDemos.apk if it has been already installed in the emulator.
Build ApiDemos and ApiDemosTests projects and install them.
Now, if you execute Dev Tools in the emulator and go to Instrumentation, you'll find Test for Api Demos. in the list.
Select it and you will obtain the tests results. Unfortunatelly by now, the reslts will be only visible in the logcat window
11-09 22:56:35.132: INFO/instrumentation(153): Test results for InstrumentationTestRunner=......................
11-09 22:56:35.132: INFO/instrumentation(153): Time: 6.739
11-09 22:56:35.132: INFO/instrumentation(153): OK (22 tests)
or alternativelly, from the command line
$ adb shell am instrument -w com.example.android.apis.tests/android.test.InstrumentationTestRunner
com.example.android.apis.ApiDemosApplicationTests:....
com.example.android.apis.ApiDemosTest:.
com.example.android.apis.app.ForwardingTest:...
com.example.android.apis.app.LocalServiceTest:.....
com.example.android.apis.os.MorseCodeConverterTest:.
com.example.android.apis.view.Focus2ActivityTest:....
com.example.android.apis.view.Focus2AndroidTest:....
Test results for InstrumentationTestRunner=......................
Time: 7.493
OK (22 tests)
Conclusion
So simple that I can't understand why they are not provided in this way by the original Android ApiDemos project.
Next time we will try to present test results in a more concise way inside the emulator as Electro did (video1, video2, video3).
Thursday, November 06, 2008
Android: Testing on the Android platform - Unit tests

- create your Android project
- add the tests source folder (New -> Source Folder -> Folder name: tests/src)
- in the newly created folder add a Java Package. Its name should be the same as the project package with .tests appended
- in the 'tests' package create a new JUnit Test Case using JUnit 3 (New -> JUnit Test Case). Name it TemperatureConverterTest, leave class under test blank
- Copy this code into TemperatureConverterTest.java
package com.codtech.android.temperatureconverter.tests;import junit.framework.TestCase;
import java.util.HashMap;
import java.util.Map;
import com.codtech.android.temperatureconverter.TemperatureConverter;
/**
* @author diego
*
*/
public class TemperatureConverterTest extends TestCase {
private static final Map
conversionTable = new HashMap ();
static {
// initialize (c, f) pairs
conversionTable.put(0, 32);
conversionTable.put(100, 212);
conversionTable.put(-1, 30);
conversionTable.put(-100, -148); conversionTable.put(32, 90);
conversionTable.put(-40, -40);
conversionTable.put(-273, -459);
}
/**
* @param name
*/
public TemperatureConverterTest(String name) { super(name);
}
/**
* Test method for {@link com.codtech.android.temperatureconverter.TemperatureConverter#celsiusToFahrenheit(int)}.
*/
public void testCelsiusToFahrenheit() {
for (int c: conversionTable.keySet()) {
int f = conversionTable.get(c);
String msg = "" + c + "C -> " + f + "F"; int r = TemperatureConverter.celsiusToFahrenheit(c);
assertEquals(msg, f, r);
}
}
}
- Accept Eclipse hints to create TemperatureConverter class and celsiusToFahrenheit method
- Run -> Run As -> Run configurations and create a new JUnit configuration and select the previously created Test class
- Run the tests and instead of the expected test results you'll get
# An unexpected error has been detected by Java Runtime Environment:
#
# Internal Error (classFileParser.cpp:2924), pid=5364, tid=6644
# Error: ShouldNotReachHere
- That's because we are using Android's JUnit stub implementation. Go to Run -> Run As -> Run configurations again and in the recently created JUnit configuration Classpath's Bootstrap Entries remove Android Library
- Then Add Library, using Advanced... button, and add JRE System Library and JUnit 3
- Apply and Run
- And now our tests run, failing as expected. We haven't created the conversion method anyway

- Let's finish our TemperatureConverter class
- package com.codtech.android.temperatureconverter;
/**
* @author diego
*
*/
package com.codtech.android.temperatureconverter;
public class TemperatureConverter {
public static final int ABSOLUTE_ZERO_C = -273;
public static int celsiusToFahrenheit(int c) {
if (c < ABSOLUTE_ZERO_C ) {
throw new RuntimeException("Invalid temperature: " + c + " below absolute zero");
}
return (int)Math.round(c * 1.8 + 32);
}
}
Tuesday, September 16, 2008
Android thin client
I've been designing and developing thin client OSs during the last 7 years, and I was wondering if we can base a thin client OS on Android.
Let's find out.
Well, we need to change some source code to enable network booting so we have to wait, but watching this crude preview (from an 800x600 screen) perhaps begins our brainstorm...
Comments and suggestions are gladly welcome.
Thursday, September 04, 2008
from Z to A
Gnome bug #412493 has been there for more than a year, it refers to the ability of handling forms with zenity. There are some proposals, but far too way too complex.
And sometimes, simple problems deserves simple solutions...
As usual, create your form in Glade, we will use the same example described in the bug report, a simple login window for a downloader pretending being connected to ftp.bli.org.

This is the running application.
The entry fields are annotated with autoglade as:
- username:auto:init:env
- password:auto:init:env
We use this simple script (login.sh) to call autoglade using login.glade
That simple.
#! /bin/sh
export username=$LOGNAME
${AUTOGLADE:-autoglade} ${0%.sh}.glade
Tuesday, September 02, 2008
Lists meet autoglade
As other widgets, lists can be initialized from the environment using autoglade annotation to its name, for example:
treeview1:auto:init:env
will use the environment variable treeview1 to obtain list header and items
export treeview1='("Fruits" "Apples" "Bananas" "Hedge aple" "Kiwifruits" "Melons" "Oranges" "Pineapples" "Strawberries" )'
Using one of the tests also present in the svn repository
$ ./list.sh

and, after selecting one item and pressing OK
treeview1='("Kiwifruits")'
autoargs='$treeview1'
appears in application's stdout.
More information about autoglade can be obtained from http://autoglade.sf.net.
Monday, August 04, 2008
autoglade
This document can be read in Google Docs (http://docs.google.com/Edit?tab=view&docid=ddwc44gs_458qnjwvgr)
This document can be read in Google Docs (http://docs.google.com/Edit?tab=view&docid=ddwc44gs_458qnjwvgr) |
Introduction
This article will guide you through the steps needed to provide a graphical user interface (GUI) to some commands requiring almost no programming using autoglade.As a real life example we will be using some commands to control cpu frequency scaling in Asus EeePC.
EeePC features a Celeron-M (4G) with On Demand Frequency Modulation (ODFM) originally set to performance, which actually disables ODFM and fixes CPU speed to 900 MHz (or 630 MHz, as it's underclocked in BIOS prior to 8804).
From some post in eeeuser forum:
"The cpu in the EEE consumes the same wattage running idle at 900mhz(630 real) as it does running idle at the 'scaled' frequency of 112.5mhz, because the actual frequency *does not change* it's just the forced execution of halt instructions. Halt instructions do save power; when a halt instruction is executed the cpu gets a bit of 'rest' where it consumes significantly less power than if it was executing a complex SSE2 instruction."
ODFM additionally provides ondemand mode. Available governors can be obtained using this command
$ cat /sys/devices/system/cpu/cpu0/cpufreq/scaling_available_governorscurrent scaling governor can be obtained with
ondemand performance
$ cat /sys/devices/system/cpu/cpu0/cpufreq/scaling_governoras well as maximum allowed frequency
performance
$ cat /sys/devices/system/cpu/cpu0/cpufreq/cpuinfo_max_freqWhile it's not completely clear if you can save some power and extend battery life using ondemand scaling or limiting the maximum frequency, we will be using this example to create a GUI around these commands and you can test for yourself. Anyway, our final objective is the creation of the GUI and analyzing the patterns used in order to be able to reproduce this with other commands lacking a GUI.
900000
autoglade
autoglade is a tool that will take our GUI design and will automate most common usage patterns to be able to give the GUI functionality with no programming.Design the GUI
We will be using another computer to design the GUI where glade user interface builder version 3 is installed. There's nothing wrong installing glade-3 on the EeePC, but the screen would be too small to confortably design the interface and you may need an external monitor.glade-3 it's available for Linux and Windows, and because the GUI is described as an XML file it's platform independent.
This is an overview of the GUI, in this particular case using glade-3 on Windows Vista
our expanded widget tree should be something like this.
We can see some widget that have been highlighted. These widgets have received special names.
This is one of the way that autoglade uses to receive some messages from our design. Let's review them.
We have an horizontal scale widget whose name is freq:auto:init:env, that is our widget name is freq, because we are going to change the cpu frequency using it and we ask autoglade (auto) to initialize it (init) using the process environment (env) and by default autoglade will look for a variable named after the widget name (freq). Its value will be taken form the environment upon startup and the horizontal scale will be initialized having this value.
Next, we have two radio buttons to set the scaling governor to performance or ondemand.
Radio buttons are named as an incremental sequence, for example name1, name2, name3, ..., namen. In this particular case the name is governor.
In all but the first one we have to set the group property to be able to operate them as a group, that is only one can be active at a time.
As explained before the names are governor1:auto:init:env and governor2:auto:init:env, because they are the first (1) and second (2) radio buttons of the group, and we ask autoglade (auto) to initinalize (init) them using the process environment (env). In this case the variable will be governor and depending on its value (performance or ondemand) the corresponding radio will be activated on startup.
We need to send a message to autoglade to tell it how do we want to exit the event loop and thus closing the dialog and passing a value to its parent process. We do this by setting the response ID on OK and Cancel buttons to RESPONSE_OK (-5) and RESPONSE_CANCEL (-6).
Running with autoglade
Let's save it as cpufreq.glade and we are ready to test it.$ autoglade cpufreq.gladeand most of the required behavior of our GUI is already there.
Specifying initial values
You can specify the initial value for frequency$ freq=500 autoglade cpufreq.gladeor for both frequency and governor
$ freq=130 governor=ondemand autoglade cpufreq.glade
Obtaining return values
Running autoglade in one of the previously mentioned froms will give us these resultsfreq='225'to standard output with the values we have selected in the GUI.
governor='ondemand'
autoargs='$freq $governor'
Shell wrapper
We are now in condition of putting everything togheter with a shell wrapper script.Let's start with a simple one and then we can add more sophisticated features.
#! /bin/bash
AUTOGLADE=autoglade # set absolute path if autoglade is not installed
CPUFREQDIR=/sys/devices/system/cpu/cpu0/cpufreq
freq()
{
# get or set freqency
local F=$CPUFREQDIR/scaling_max_freq
local S=1000
[ -n "$1" ] && echo $(( $1 * $S )) > $F || export freq=$(( $(< $F) / $S ))
}
governor()
{
# get or set governor
local F=$CPUFREQDIR/scaling_governor
[ -n "$1" ] && echo "$1" > $F || export governor=$(< $F)
}
freq
governor
DUMP=$( $AUTOGLADE cpufreq.glade )
if [ $? -eq 0 ]
then
eval "$DUMP"
freq $freq
governor $governor
fi
Previous wrapper illustrates various common patterns.
Next time, we will be using more advanced features to finish our cpufreq application.
Monday, July 14, 2008
Vista on Asus EeePC

You can find tons of post about installing Vista on Asus EeePC, and some videos too. So, perhaps it works.
But, wait a minute !
What's the reason to install Vista ?
Because this Xandros sucks, because you can't configure it to your liking...
It's no news that AsusLauncher is very bad designed and, for example, instead of highlighting icons when the mouse is over it's using completely different images. So for every icon, you need a copy of it, highlighted multiplied by the number of themes. A total waste of disk space in such a limited environment.
Living with that limitations, and tweaking the glorious IceWM and some images and AsusLauncher XML comfiguration, you can obtain veeesta (a Vista looking EeePC running Xandros Linux).
I would have installed Ubuntu, but once that I have a Linux notebook where all of its hardware is working out-of-the-box, as if it was a Windows one, I don't want to start hunting for tweaks on how to make the wireless network work, how to make it sleep, or whatever.
If you want some instructions on how to do it, just drop me a message.
I think that this wallpapers and images cannot be redistributed due to Microsoft copyrights.
Enjoy veeesta !
Ohh, I almost forgot to show you the themed firefox and taskbar...
Monday, April 14, 2008
Android Developer Challenger: Electron yet another demo
Another Electron demo, this time we have an extremely simple Web Activity application driven from the Electron test web service.
We can see in this test how we start the activity, wait for its progress until loaded completely, scroll down, follow a link and finishing.
What kind of application being tested would you like to see ?
Android Developer Challenger: Electron and a slightly more interesting demo
Here I'm presenting a slightly more interesting one: driving the Touch Paint application through the test web service.
I hope you enjoy it.
We can see how the activity is started, non-fade is selected from the menu, pointer commands are sent and translated to events by Electron and finally fade is enabled, wait some time and the application is finished.
Still, more to come.
Saturday, April 12, 2008
Android Developer Challenger: Electron Acceptance and Unit Testing Framework
Some Unit Tests can be run in Eclipse, but you were not be testing on the real target. So be careful on that.
Google also provides application instrumentation code through Instrumentation class. When running with instrumentation turned on, this class will be instantiated for you before any of the application code, allowing you to monitor all of the interaction the system has with the application. An Instrumentation implementation is described to the system through an AndroidManifest.xml's
In the process of writing my own library and tools, I discovered Phil Smith's positron an Open Source library, so I decided to extend his excellent work and bring some new and missing pieces to the table.
And although positron is the anti-particle of the electron, and they annihilate if collide, take for granted that it's not the idea here, but more the conservation of the energy and the generation of some "visible light and waves".
Featured components
Android Electron Acceptance And Unit Tests
Android Electron Acceptance and Unit Test contains some sample applications and their tests:
Temperature Converter Touch Paint Web Activity
Android Electron Test Results is the application used to display test results.
In this video demonstration, Temperature Converter application is tested and some tests failures are showed, because the temperature conversion function is not yet implemented and returns always zero, as an step in the Test Driven Development process.
There's also a web service like interface to drive the tests, as showed in this video.
Electron Java SE version to drive the tests from the development environment. The ZIP contains the needed components to run Electron, Javadocs and some sample test scripts.
Tests can be scripted, and for example, the test we saw in the video demonstration before can be written as
#! /usr/bin/env electronStay tuned. More on Electron later.
start?package=com.codtech.android&\
class=com.codtech.android.adc.tdd.TemperatureConverterActivity
press 123
DOWN
DOWN
CLICK
@celsius.text
assert 123
@fahrenheit.text
assert 253 123C_=>_253F
finish
Saturday, March 22, 2008
Automating port redirection in Android
To redirect port you need to
telnet localhost 5554
to open the emulator's console and then add the desired redirection commands, like
redir add tcp:5000:5000
But, is there another way than typing the commands every time ?
It's much likely that you make a mistake and wonder why your application stopped working until you realize your typing mistake.
I couldn't find any other documented way of automating port redirection, so I decided to go my way.
Python to the rescue
This is clearly a task for expect, but instead of trying to remember how to program TCL I decided to go with the python alternative: pexpect.
The script is named, pretty obviously, android-redir.py:
Download the script from here.
#!/usr/bin/env python
"""
$Id$
"""
__license__ = """
Copyright (C) 2008 Diego Torres Milano
This program is free software; you can redistribute it and/or modify
it under the terms of the GNU General Public License as published by
the Free Software Foundation; either version 2 of the License, or
(at your option) any later version.
This program is distributed in the hope that it will be useful,
but WITHOUT ANY WARRANTY; without even the implied warranty of
MERCHANTABILITY or FITNESS FOR A PARTICULAR PURPOSE. See the
GNU General Public License for more details.
You should have received a copy of the GNU General Public License
along with this program; if not, write to the Free Software
Foundation, Inc., 59 Temple Place - Suite 330, Boston, MA 02111-1307,
USA
"""
__name__ = 'android port redirection'
__version__ = '0.3'
__rev__ = '$Revision$'
#~~~~~~~~~~~~~~~~~~~~~~~~~~~~~~~~~~~~~~~~~~~~~~~~~~~~~~~~~~~~~~~~~~~~~~~~~~
# redirections can be added to ~/android/redir.conf, one per line,
# as an example, 'tcp:5000:6000' will route any packet sent to the host's
# TCP port 5000 to TCP port 6000 of the emulated device
#
# default emulated device:
host = 'localhost'
port = 5554
#~~~~~~~~~~~~~~~~~~~~~~~~~~~~~~~~~~~~~~~~~~~~~~~~~~~~~~~~~~~~~~~~~~~~~~~~~~
import sys
import os
from optparse import OptionParser
import pexpect
usage = "usage: %prog [options] [{tcp|udp}:hostport:emuport] ..."
parser = OptionParser(usage=usage, version="%prog " + __version__)
parser.add_option("-v", "--verbose", dest="verbose", default=False,
action="store_true",
help="verbose output [default: %default]")
parser.add_option("", "--host", dest="host", default=host,
help="HOST where emulator is running [default: %default]")
parser.add_option("-p", "--port", dest="port", default=port,
help="emulator console PORT [default: %default]")
parser.add_option("-n", "--dry-run", dest="dry_run", default=False,
action="store_true",
help="Don't execute the commands")
(options, args) = parser.parse_args()
redirs = []
cmd = 'telnet %s %d' % (options.host, options.port)
try:
for redir in open(os.path.expanduser("~") + "/.android/redir.conf"):
redirs.append(redir[:-1])
except:
pass
for redir in args:
redirs.append(redir)
if options.verbose:
print cmd
if len(redirs) > 0:
print "adding redirections:"
for redir in redirs:
print "\t" + redir
if options.dry_run:
sys.exit(0)
if len(redirs) == 0:
print >>sys.stderr, "ERROR: redirection list is empty."
sys.exit(1)
child = pexpect.spawn(cmd)
child.expect("OK")
for redir in redirs:
child.sendline("redir add " + redir)
r = child.expect(["OK", "KO: host port already active", "KO:.*"])
if r == 2:
raise Exception(child.after)
if options.verbose:
child.sendline("redir list")
child.expect("OK")
print child.before
child.sendline("quit")
Usage
This is the script help showing its usage, accessible by
$ android-redir.py --help
Usage: android-redir.py [options] [{tcp|udp}:hostport:emuport] ...
Options:
--version show program's version number and exit
-h, --help show this help message and exit
-v, --verbose verbose output [default: False]
--host=HOST HOST where emulator is running [default: localhost]
-p PORT, --port=PORT emulator console PORT [default: 5554]
-n, --dry-run Don't execute the command
You can also create ~/.android/redir.conf file and add the redirections you want, one per line
tcp:5000:5000
udp:50001:50001
and they will be read every time the script is run.
Next time we will be looking at how to integrate this with the emulator to run both commands at the same time.
Tuesday, March 11, 2008
Test Driven Development and GUI Testing on the Android platform: Temperature Converter sample revisited
|
WARNING: Blogspot engine change the link, so you have to cut and paste. |
Functional tests
The new Google Android SDK provides some improvements to the Instrumentation code and the ways of handling it. Using Dev Tools, now you can find and Instrumentation list entry that shows all of the classes providing Instrumentation and a way to run it.Positron
We will be using positron positron-0.8-alpha and we will introduce one small change. Positron only presents the test results in the DDMS perspectiveINFO/Positron(16414): .F..F...
INFO/Positron(16414): Time: 6.46
INFO/Positron(16414): There were 2 failures:
the idea is to use an Intent to be able to present the results as an activity: AndroidTestResults.
First, let's introduce this changes to the base Positron
- we have to define the intent
- using a Template Method pattern with a method called doHandleResult() implement invariant and variable parts of the algorithm
- define a default donHandleResult() to do nothing
public abstract class Positron extends Instrumentation { public static final String VIEW_TEST_RESULTS_ACTION = "positron.action.VIEW_TEST_RESULTS"; ... @Override public void onStart() { backup(); ByteArrayOutputStream testOutput = new ByteArrayOutputStream(1024); InstrumentedTestRunner runner = new InstrumentedTestRunner(this, new PrintStream(testOutput)); InstrumentedTestResult result = (InstrumentedTestResult)runner.doRun(suite()); Log.i(TAG, testOutput.toString()); // this implements a TEMPLATE METHOD pattern // by DTM doHandleResult(result); finishAll(); pauseButton.quit(); restore(); waitForIdleSync(); finish(result.errorCount() == 0 && result.failureCount() == 0 ? 0 : 1, result.toBundle()); } ... /** handle the result in the desired way */ protected void doHandleResult(InstrumentedTestResult result) { // do nothing } }doHandleResult gives us the ability to handle the results in the way we want.
As part of the instrumentation of TemperatureConverter tests we have implemnented a class Positron that extends positron.Positron. In this class we need to implement the abstract method suite() returning our TestSuite, but now we are also adding our Template Method.
@Override protected void doHandleResult(InstrumentedTestResult result) { Intent intent = new Intent(VIEW_TEST_RESULTS_ACTION); intent.putExtras(result.toBundle()); intent.putExtra("suite", suite().getName()); getContext().broadcastIntent(intent); }
OverallTest
Let's change our OverallTestpackage com.codtech.android.tdd.validation;
import java.io.IOException; import android.content.Intent; import com.codtech.android.tdd.R; import com.codtech.android.tdd.TemperatureConverterActivity;
/** * @author diego * */ public class OverallTest extends positron.TestCase { private static final String TAG = "OverallTests"; private TemperatureConverterActivity activity; /** * @param name */ public OverallTest(String name) { super(name); } /* (non-Javadoc) * @see junit.framework.TestCase#setUp() */ protected void setUp() throws Exception { super.setUp(); Intent intent = new Intent(getTargetContext(), TemperatureConverterActivity.class); startActivity(intent.addLaunchFlags(Intent.NEW_TASK_LAUNCH)); activity = (TemperatureConverterActivity)activity(); // Is it our application ? assertEquals(getTargetContext().getString(R.string.app_name), activity().getTitle()); // Do we have focus ? assertEquals(activity.getCelsiusEditText(), activity.getCurrentFocus()); } /* (non-Javadoc) * @see junit.framework.TestCase#tearDown() */ protected void tearDown() throws Exception { finishAll(); } public void testConversion() { // Enter a temperature sendString("123"); // Convert press(DOWN, DOWN, CENTER); // Why 2 downs are needed ? // Verify correct conversion 123C -> 253F assertEquals("valid conversion", "253", activity.getFahrenheitEditText().getText().toString()); } public void testValidCharachters() { // Enter invalid characters (only digits and +/- are allowed String str = "-0123456789"; sendString(str); assertEquals("invalid characters", str, activity.getCelsiusEditText().getText().toString()); } public void testInvalidCharachters() { // Enter invalid characters (only digits and +/- are allowed // in this "digits" mode, some keys are automatically converted into its // numeric keypad equivalentes (i=>-, o=>+, p=>+, etc.) sendString("abcdefghpqrstuvwxyz"); assertEquals("invalid characters", "", activity.getCelsiusEditText().getText().toString()); } public void testInvalidConversion() { // Enter a temperature sendString("-274"); // Convert press(DOWN, DOWN, CENTER); // Why 2 downs are needed ? // Verify that the wrong value is still displayed assertEquals("invalid conversion", "-274", activity.getCelsiusEditText().getText().toString()); // FIXME // there's still no way to determine if the dialog is showed //assertTrue("exception raised and handled", activity.getFahrenheitEditText().getText().toString().contains("below absolute zero")); } public static void main(String[] args) { try { positron.RunTests.main(new String[] {"com.codtech.android.tdd", ".Positron", "/opt/java/android-sdk"}); } catch (IOException e) { e.printStackTrace(); } } }
Now, we can run our Acceptance Test just running OverallTest as a Java Application (right click, RunAs -> Java Application).
In order for this to work we need TemperatureConverter installed into the emulator and the emulator running.
The Instrumentation will run, and just before finishing, Positron will be broadcasting and intent ("positron.action.VIEW_TEST_RESULTS")which is then received by an IntentReceiver which in turn start an activity.
Here, there are tow videos that show the process of launching the tests from Dev Tools.
Monday, March 03, 2008
Android: Playing with Intents
Android Intent Playground 2.0 is described in this post:
Diego Torres Milano's blog: Android Intent Playground 2.0
|
|
Intents
From Google documentation: “An Intent is a simple message object that represents an ”intention” to do something. For example, if your application wants to display a web page, it expresses its “Intent” to view the URI by creating an Intent instance and handing it off to the system. The system locates some other piece of code (in this case, the Browser) that knows how to handle that Intent, and runs it. Intents can also be used to broadcast interesting events (such as a notification) system-wide.”
An intent is an abstract description of an operation to be performed. It can be used with startActivity to launch an Activity, broadcastIntent to send it to any interested IntentReceiver components, and startService(Intent, Bundle) or bindService(Intent, ServiceConnection, int) to communicate with a background Service.
Intents are one of the most distinctive components of the Android platform. They, among other things, provide the transition between Activities in a similar model as the browser model, where the user navigates from on page to the other and can also go back.
Intent attributes
| Intent | |
|---|---|
| primary attributes | |
| action | The general action to be performed, such as VIEW_ACTION, EDIT_ACTION, MAIN_ACTION, etc. |
| data | The data to operate on, such as a person record in the contacts database, expressed as a Uri. |
| secondary attributes | |
| category | Gives additional information about the action to execute. For example, LAUNCHER_CATEGORY means it should appear in the Launcher as a top-level application, while ALTERNATIVE_CATEGORY means it should be included in a list of alternative actions the user can perform on a piece of data. |
| type | Specifies an explicit type (a MIME type) of the intent data. Normally the type is inferred from the data itself. By setting this attribute, you disable that evaluation and force an explicit type. |
| component | Specifies an explicit name of a component class to use for the intent. Normally this is determined by looking at the other information in the intent (the action, data/type, and categories) and matching that with a component that can handle it. If this attribute is set then none of the evaluation is performed, and this component is used exactly as is. By specifying this attribute, all of the other Intent attributes become optional. |
| extras | - This is a Bundle of any additional information. This can be used to provide extended information to the component. For example, if we have a action to send an e-mail message, we could also include extra pieces of data here to supply a subject, body, etc. |
The best way to explore all of this somewhat complex model is to try it out.
Some examples of action/data pairs are: * VIEW_ACTION content://contacts/1 – Display information about the person whose identifier is “1”. * EDIT_ACTION content://contacts/1 – Edit information about the person whose identifier is “1”. * VIEW_ACTION content://contacts/ – Display a list of people, which the user can browse through. This example is a typical top-level entry into the Contacts application, showing you the list of people. Selecting a particular person to view would result in a new intent { VIEW_ACTION content://contacts/N } being used to start an activity to display that person. * PICK_ACTION content://contacts/ – Display the list of people, allowing the user to browse through them and pick one and return it to the parent activity. This could be used, for example, if an e-mail application wanted to allow the user to pick a person
Should say
- VIEW_ACTION content://contacts/people/1 – Display information about the person whose identifier is “1”.
- EDIT_ACTION content://contacts/people/1 – Edit information about the person whose identifier is “1”.
- VIEW_ACTION content://contacts/people/ – Display a list of people, which the user can browse through. This example is a typical top-level entry into the Contacts application, showing you the list of people. Selecting a particular person to view would result in a new intent { VIEW_ACTION content://contacts/people/N } being used to start an activity to display that person.
- PICK_ACTION content://contacts/people/ – Display the list of people, allowing the user to browse through them and pick one and return it to the parent activity. This could be used, for example, if an e-mail application wanted to allow the user to pick a person
Intent Playground
To explore these relationships, I've made a simple application that allows you to play with Intents and see the results.
This application completes the intent attributes with the information provided and sometimes with other information obtained from it and then invokes the corresponding method.
AndroidIntentPlayground source and binaries can be downloaded from AndroidIntentPlayground.zip.
action
It's an AutoCompleteTextView to select an action from the list (try entering the first letter as a or c. You can also enter the desired action if it's not in the list.
See Intent attributes.
data uri
The data Uri to act on.
See Intent attributes.
type
The MIME type.
See Intent attributes.
intent
Select the kind of method to invoke
- broadcast: use
broadcastIntent(intet) - activity: use
startActivity(intent) - service: use
startService(intent, null) - resolve: use
Intent.resolveActivity()
activity
When the activity is resolved the class name is showed here.
button
Press the button to send the Intent.
Examples
broadcast
Our first example is an intent broadcast. If there's an IntentReceiver which has an Intent that matches our attributes then its onReceiveIntent() method will be invoked. I've explained how to create an IntentReceiver only application in a previous post. If you have installed the SampleIntentReceiver.APK, we can try this example.
Set action to com.codtech.android.training.intent.SAMPLE_ACTION, leave the other fields blank and the intent to broadcast. Press the button and you'll see
Explanation
If we try to resolve the Intent we will receive an error, but broadcasting the intent it reaches our SampleIntentReceiver and the dialog is displayed.
This intent filter in our SampleIntentReceiver AndroidManifest.xml matches
<receiver android:name=".SampleIntentReceiver">
<intent-filter>
<action android:name="com.codtech.android.training.intent.SAMPLE_ACTION"/>
</intent-filter>
</receiver>
start activity
Set action to android.intent.action.VIEW and data uri to content://contacts/people/1, set intent to activity and the press the button.
Explanation
After pressing the button we will see our first contact displayed.
The intent was resolved to com.google.android.contacts.ViewContactActivity and this activity is invoked by startActivity(intent).
service
Set action to com.google.android.samples.app.REMOTE_SERVICE, leave the other fields blank, and set intent to service. Press the button.
And the RemoteService will be started.
However, if we try to stop the service, opening the sliding top panel and clicking on SampleRemoteService instead of getting this service activity we'll get LocalServiceController and we cannot stop it. Another bug ?
Workaround: Go to Home, ApiDemos → App → Service → Remote Service Controller and the Stop Service.
Explanation
The intent is used as a parameter of startService(intent, null) and the requested service is started if needed.
resolve
Se action to android.intent.action.WEB_SEARCH, enter some strings into data uri, for example cult thinclient. Set intent to resolve and the press the button. We can see that the action is resolved to com.google.android.browser.BrowserActivity. If we further change intent to activity and press the button again, we will see the browser starting and doing the Google search.
Explanation
The activity is resolved to the corresponding class, and if we use this information to start the activity we will see the web browser presenting the search.
Conclusion
This application, Intent Playground, has helped me a lot to discover some interactions between the Android components.
However, I was not able to intercept the intent used by the contacts application when you try to edit its photo. Could it be using an intent instantiated used an explicit class com.google.android.fallback.Fallback ?
Do you have any clue ?
Friday, February 29, 2008
IntentReceiver only application
| Google Docs: This document is published at http://docs.google.com/Doc?id=ddwc44gs_27dwrnrwrk WARNING: Blogspot engine change the link, so you have to cut and paste. |
If you want to react in some way to one or various Intents and you don't need an Activity you can have an IntentReceiver only application. You class must extend IntentReceiver and you have to override onReceiveIntent method.
This has been asked many time in android groups, but there was no clear answer and ApiDemos doesn't show an example of this either. So I hope this helps and saves you some time.
Create AndroidSampleIntentReceiver project
Create AndroidSampleIntentReceiver project as usual.
You can use Dummy as the Activity and Application name. We will remove them shortly.
Delete Dummy.java
Go to the project and delete Dummy.java right clicking on it and selecting Delete from menu.
Create SampleIntentReceiver class
Right clicking on the com.codtech.android.training.sampleintentreceiver or whatever you've selected for your package, create a new Java class
and edit its content to have
/**
* Copyright © 2008 Diego Torres Milano <dtmilano at gmail dot com>
*/
package com.codtech.android.training.intentreceiver;
import android.content.Context;
import android.content.Intent;
import android.content.IntentReceiver;
import android.util.Log;
import android.widget.Toast;
/**
* @author diego
*
*/
public class SampleIntentReceiver extends IntentReceiver {
private static final String TAG = "SampleIntentReceiver";
/*
* (non-Javadoc)
*
* @see android.content.IntentReceiver#onReceiveIntent(android.content.Context,
* android.content.Intent)
*/
@Override
public void onReceiveIntent(Context context, Intent intent) {
String msg = "SampleIntentReceiver:nonReceiveIntent(context="
+ context.getPackageName()
+ ", intent=[" + intent.getAction() + ", " + intent.getType()
+ ", " + intent.getData() + "])";
Log.d(TAG, msg);
Toast.makeText(context, msg, Toast.LENGTH_LONG).show();
}
}
Modify AndroidManifest.xml
Refactoring the code doesn't change the AndroidManifest.xml, perhaps a deficiency of the Eclipse ADT plugin, so we need to manually edit it. Our intention is to have an application consisting only in an IntentReceiver, with no Activity and this is precisely what we need to remove from this file.
Use the XML view in the editor.
<?xml version="1.0" encoding="utf-8"?>
<manifest xmlns:android="http://schemas.android.com/apk/res/android"
package="com.codtech.android.training.sampleintentreceiver">
<application android:icon="@drawable/icon">
<receiver android:name=".SampleIntentReceiver">
<intent-filter>
<action android:name="com.codtech.android.training.intent.SAMPLE_ACTION"/>
</intent-filter>
<intent-filter>
<action android:name="android.intent.action.GET_CONTENT"/>
<data android:mimeType="image/*"/>
<category android:name="android.intent.category.DEFAULT"/>
</intent-filter>
</receiver>
</application>
</manifest>
We have just added some sample intent-filters, you can add the ones you are interested in.
Install the application
Install you application APK using
$ adb install AndroidSampleIntentReceiver/bin/AndroidSampleIntentReceiver.apk
Once the application is installed, there's no need to run it. Android will be responsible to run it and invoke onReceiveIntent.
Broadcast an Intent
From your application code, that is another application you want it to broadcast some Intents that will be “trapped” by our SampleIntentReceiver. For example
Intent intent = new Intent("com.codtech.android.training.intent.SAMPLE_ACTION");
// do something
broadcastIntent(intent, null);
and if everything went well